|
Marking out the baseboard and bridges |
||
|
Click on these images for a larger image and for further details
Click on the images above for further information |
In order to mark out the various lengths and distances a number of marking-out sticks had to be made. All of the measurements on this sticks were marked out in Neapolitan once and not in millimetres. Although the distances were measured out in millimetres in order to make the sticks accurate, the measurements on the instruments were all carried out using the measurements on the sticks in Neapolitan once.
The first stick to be made was the oncimetro which was just an ordinary ruler marked out in Neapolitan piedi = 262.008mm, Neapolitan once = 21.834mm and decimi, the sub-division of the oncia into 10. This stick was made out of a piece of maple and had a length of 4 piedi. Eventually, for convenience a number of shorter rulers were also made.
A lateral string-spacing stick was made to mark out the position of the c note on the line of the nut marking on the baseboard and, eventually, on the wrestplank, to mark out the jackslots of the register and to mark out the bridge and nut positions.
A second marking-out stick was made to mark out the lengths of the various baseboard measurements like the length of the spine and cheek, the width, the components of the tail angle, the position of the nameboard, wrestplank edge, belly rail, etc. This was made using the same method described above for the lateral string-spacing stick.
A final stick was made for the string lengths and plucking points using the same method. This gave the plucking points of the notes C, c1 and c3, the lengths of all of the c notes throughout the compass as well as the lengths of the top (transposed) d3 strings. The lengths of the long E and F strings (separate bridges were used for the red brass and yellow brass strings and the transition occurred between these notes) were also marked on this stick. The design of the string scaling is discussed at the beginning of the section on the design of a prototype instrument.
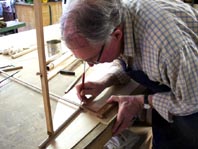
Using the sticks the position of the front keywell edge, the wrestplank, the wrestplank support blocks, the register gap and the lower and upper belly rails were scribed onto the baseboard using measurements in once from the drawing sketch and using the sticks that had been prepared for doing this. The position of the line of the quill plucking points in the register gap was marked out and the position of the nut was marked out by measuring backwards toward the player end of the baseboard by the amount of the plucking points. The line of the nut was then also scribed onto the baseboard. Using the lateral string spacing stick the lateral spacing of each of the long c strings was marked onto the baseboard along the line of the nut already marked out.
From the position of the marks along the line of the nut the string lengths for each of the long c strings were measured out, marked and scribed onto the baseboard. A curved line joining the bridge ends of the string markings was scribed out. A second line was also scribed out joining the ends of the string markings for the red brass strings in the bass. These lines represent the final position of the bridge above the baseboard.
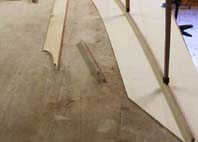
The position of the bentside was marked out by measuring a distance of 6 once from the curved line representing the bridge position. The lines of the tail and cheek were marked out on the baseboard and the outside edges of the baseboard were cut away. A soundboard was prepared and the angled line of the front, near edge of the soundboard was marked out and accurately cut.
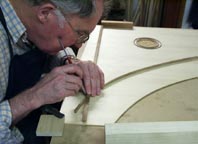
The soundboard was placed onto the baseboard and clamped to maintain its position. The positions of the ends of each of the c strings was marked onto the soundboard in the same way that they had been marked onto the baseboard. Using the edge of the baseboard as a template the position of the outside edges of the baseboard were scribed onto the lower surface of the soundboard before it was unclamped. The soundboard was then unclamped and the excess outer edges of the soundboard were cut away so that the soundboard had exactly the same shape as that of the baseboard.
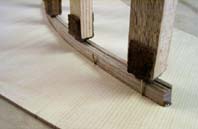
The soundboard was temporarily put aside while the case of the instrument was constructed onto the baseboard. The wrestplank supports, keyframe supports, wrestplank, belly rail and the knees and internal framing were all glued in place. The soundboard liners were all glued into their recesses in the knees and internal braces.
Further details about the construction procedure are given in a resumé elsewhere on this site.
Go back to the main page of this section
|
|